When planning the
Ultimate, Magical Harry Potter Party, spend some time thinking about whether you want to do a general Harry Potter theme, or if you want to represent a specific book or movie. We chose to do a general theme and so we used elements here and there from the entire series of books/movies.
Platform 9 3/4
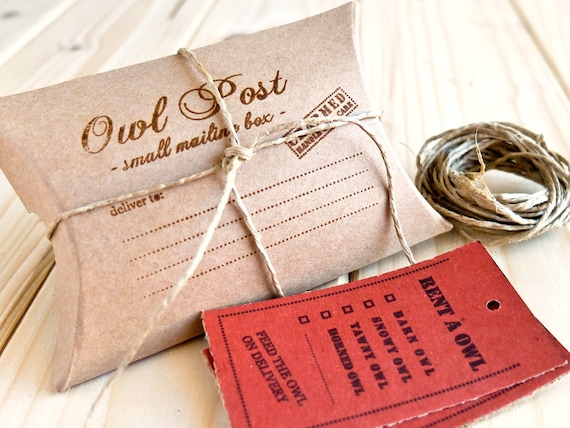
We decorated our entry way (above) to look like the train platform 9 and 3/4, and you can find similar versions elsewhere on blogs and Pinterest. I made the brick wall curtain out of a sheet (directions located at the bottom of this post). I had an old looking trunk, originally purchased from Hobby Lobby using my 40% off coupon. I found the old suitcase at an antique shop. I purchased the Hogwarts banner online from Amazon.com, and hung it on some painted PVC pipes (which I had already made to hang the sails of a Pirate ship from a Pirate party) with a wooden stand my hubby made. I bought the plush owl from Amazon as well. The bird cage was from Hobby Lobby. I made the broom by grabbing some dried tall grasses and reeds, bunching them together, and using wire to secure them around a long, skinny branch. Grab a couple of empty boxes wrapped up with packaging string, addressed to Mr. Potter, and that completes the look.
Gringott's
When guests entered our house, their first
stop was Gringott's to get their spending money. I got these little
cauldrons and fake coins on sale after St. Patrick's Day at Party City.
Each guest got a cauldron full of coins, a Honeyduke's coupon good for
one chocolate frog, and a list of supplies they would need for school as
first year students. Then they were off to Diagon Alley to get their
supplies. I also had kids fill out a quick House quiz, so I knew which
house to put them in.

Diagon Alley
We have a large basement with multiple rooms. We turned each room into a different shop at Diagon Alley, although we didn't represent ALL the shops of Diagon Alley. There's just too many of them.
Eeylops Owl Emporium - Some people actually go through the trouble of sewing little felt owls to give out to each of their guests. I didn't have time for that, so my owl emporium was more like an information booth. There were pictures of different kinds of owls and some facts about them, a few nests with some fake eggs, and a bowl of feathers (enough for each guest to take one feather). I used a display shelf I bring to craft fairs, that my husband made for me, which consists of three window shutters, connected by hinges, with some sections removed so two wooden shelves could be thread through it. This picture shows only the bottom half of the display.
Flourish and Blotts - I turned a bookcase into this popular bookstore, by covering some books we already owned with brown paper and made them look antiqued. I also printed some pictures of a shelf full of old books, and used it as a facade in some spots so I didn't have to recover every single book. This was where the students had to pick up their books. I made three little booklets for each kid to pick up: one for potions, one for herbology class, and one for spells. For the second party, I also made the book of monsters, which I displayed on one of the shelves (not pictured here).
Madam Malkins - If you have costumes for the guests, this would be the place for them to get fitted for their robes. I asked our guests to bring their own costumes or dress up as their favorite character, so we didn't need this shop. I simply locked the door and hung a sign on it that said "closed...visiting relatives in Bavaria. Be back on Tuesday."
Quality Quidditch Supplies - For this I just decorated a table and some shelves. I had a few brooms lying around, a Broomstick catalog, and baskets labeled with other quidditch supplies, such as golden snitches, uniforms, quaffles, and bludgers. I had the guests look through the catalog and pick out which broom they wanted. I asked them to fill out an order form and leave some coins to get their broom (which was to be delivered at some point in the future to Hogwarts). I used some Harry Potter stickers I found at a scrapbooking store to make the labels seem more authentic. The golden snitch was a prop from a Halloween store.
Ollivanders - is a wand shop, so we used my craft room for this shop and we made wands as one of the crafts during the party. See the Harry Potter Party Games, Crafts, and Activities post for more details on making wands.
Slug & Jiggers Apothecary - I had another bookcase with glass doors on it that I turned into the apothecary. This is where students picked up their potion ingredients, such as Gillyweed (kelp sheets cut into little squares), Powdered Bicorn Horn (ground flaxseed), Aconite Tea (loose-leaf green tea), Black Obsidian Stone (a polished, black stone), Petrified Unicorn Tears (iridescent, tiny flattened marbles). All these items were placed into tiny plastic bags and labeled accordingly. I forgot to take a picture of this until after the party, and by then all the bowls were empty.
Magical Menagerie - This is where students get their magical creatures, which in our case was flobberworms, (blue gummy worms). It is also where I held the Care of Magical Creatures class. This was just another shelf I turned into a "shop." I had one shelf with 4 baby dragons and 4 different dragon eggs (to represent the Tri-Wizard Tournament). I had a shelf with Acromantulas (spiders). I also had some jars full of fake, creepy crawly bugs, snakes, basilisk eggs, and some other more dangerous creatures, which were "locked up in the trunks for their safety." Although not pictured here, I also hung posters on the wall of some of the creatures mentioned in the Harry Potter books, like Acromantulas, Basilisks, and Hippogriffs, which I used to teach the class later.
The Leaky Cauldron - The kitchenette/bar area was turned into the Leaky Cauldron, where the kids could take a break and try some Butterbeer or Pumpkin Juice.
After the shopping was finished, the kids went to Hogwarts to get sorted into their houses and begin their classes. We had a lot of kids come to the party (roughly 20-25), so we divided them into 4 groups and held 4 classes, rotating the groups through 4 stations (potions, herbology, defense of the dark arts, and care of magical creatures). Check out the Harry Potter Games and Activities to see how we decorated each of those areas and for more details about those classes.
The Great Hall
We ate our meal in the Great Hall at Hogwarts (my dining room of course). I made paper candles and suspended them from the ceiling at various heights using clear fishing line. I made paper flames, but you could use electronic taper candles that flicker for a truly magical effect. On one wall I hung the four house banners. At the time, I couldn't find the house banners available for purchase, only the black Hogwarts one, so I just printed the crests from coloring pages I found online and had my kids color them. I cut them out and glued them to a solid color piece of cardstock in the correct color for each house. For the other wall, I found a bunch of cheap frames at a thrift shop, and a collection of creepy looking, old, black and white photos online that I just printed and hung randomly all over the wall. Okay...yes, one of the portraits is Edgar Allen Poe. I couldn't resist. When I see him I think of the Raven and it's just creepy. We didn't spend very much time in this room, so I didn't spend as much time decorating it. If I do this party again, I might try to find pictures of some of the ghostly people featured on the Hogwarts wall from the movie to print and frame.


Lastly, I created a table for the kids to deposit the birthday presents. I made a few more fake books and a fake newspaper, along with the sorting hat, which we used to sort the kids into their houses. I also created posters of the Proclamations from the Ministry of Magic which I "tacked" to the wall and some wanted posters of notorious criminals, like Bellatrix Lestrange.
Instructions for Making Harry Potter Props and Party Decorations
Making the brick wall for Platform 9 3/4:
I used a king size tan-colored sheet. I folded it in half, lengthwise, to find the middle, and made a small slit at the bottom. Then I simply tore it to the top (wide) hem, but not through it. Next I cut across the top hem at each end, so I had a little tube to thread the curtain rod through, without having to sew one myself. You could also use any large piece of fabric and make your own hem at the top that is wide enough to accommodate an adjustable shower curtain tension rod. Next I took a rectangle sponge, a disposable plastic or Styrofoam plate and some acrylic paint in a couple different shades of browns, tans, reds, and/or grays, depending on what color bricks you want. I tried to make mine match the bricks that were on the front of our house, so it looked like they were truly walking into part of the wall. Lay a plastic shower curtain, a paint cloth, some large garbage bags, or large pieces of cardboard down underneath the sheet, because
the paint will bleed through the fabric onto whatever is underneath!! Squirt a few puddles of 3 different shades of paint onto the plate, swirl it with the tip of your sponge to create a somewhat marbled effect. This just adds some variation in the color, so the bricks look more realistic. Lay your sponge (flat), down into the paint and pat lightly to coat. Start from the top or the bottom and "stamp" a line of evenly spaced rectangles horizontally across the fabric, to create bricks, adding more paint as needed. Don't worry if the sponge doesn't totally saturate the fabric. You want to have a few blank spots where the paint doesn't touch, so it looks like the texture of brick. When you get to the next row, stagger the bricks, so the edges don't line up with the ones above, but are centered in between two, to get a realistic looking brick pattern. Use the picture at the top as a reference. Keep working, row by row, until you've finished both panels.
Making a Sorting Hat:
First, I used a large piece of tag board to make a cone shape, by cutting out a large circle, finding the center point, then cutting one slit from the edge of the circle to the center point. Allow the cut edges to slide past each other and keep tightening until it forms a cone shape that is big enough to fit on a child's head. I used my kid to measure the right size. Tape it in place. Next I used brown paper grocery bags (the unprinted portions) and a paper mache recipe. This project gets messy, so put down some plastic or newspaper to protect your workspace. Brown paper starts to fall apart when it gets too wet, so you have to work kind of quickly and delicately. Dip a scrap of brown paper into paper mache, use your fingers to slide some of the excess paste off, then wrap it around the cone. Allow the paper to fold and crinkle. Keep working until the entire cone is covered. Create a brim. Next form some additional folds to give the impression of two eyes and a mouth (see picture). When the hat is fully dry, which may take a few days, you can paint it. I used chocolate brown spray paint (outside) and just lightly sprayed. You want there to be parts that remain unpainted so the original brown paper shows through. This gives it a weathered old leather look. Lastly, use a darker brown, black, or charcoal gray paint and dry brush the depressions where the eyes and mouth are, to make them more distinct. The dry brush technique simply means take a dry paint brush, without getting it wet, and just dip the very tip in a small amount of paint, then quickly drag it over in a crisscross kind of pattern. You don't want the area to be completely covered in paint. Voila! You're done!
Making Hanging Candles:
Take a piece of cream colored or white cardstock. Roll it around a mop or broom handle to form a tube, then glue or tape the end down. My tape kept coming apart, even when I used double-sided sticky tape. I had the best luck with rubber cement. It dries quickly, stays put, and is easy to fix (before it dries) if you make a mistake. I used a piece of tape to hold it in place until it dried. Then I cut "flames" out of yellow construction paper or cardstock, that was wider than the diameter of the top of the candle, but then I made little tails that were the same diameter of the candle, so it would fit down into the tube and hold the flame in place. I used an orange marker to draw a little flame in the center, then taped it to the inside of the candle. (See picture above) I used a teeny tiny hold punch to create a small hole near the top of the candle (on the candle, not on the flame), and I tied a short length of fishing line to it, and then I used small, clear command hooks to attach them to the ceiling. Tape and thumb tacks didn't work. The candles kept falling down because tape/tacks couldn't hold the weight of the candle. I've also made paper candles that are big enough to accommodate an electric tealight at the top, but they are heavier, trickier to work with, and a bit more costly. It's tricky to keep the tealight from slipping down into the tube of the candle. If you tape or glue the tealight in, you'll end up destroying the paper candle later if you need to take the tealight out for any reason (like when the battery needs to be changed halfway through the party). When using tealights, it's best if you can make them removable.
I found all the rest of the signs, labels, and printable templates by searching through Pinterest.


